

Finding the right balance with your living room walls and wall colours issues and their solution comes down to identifying structural flaws, choosing the correct finishes, and scaling your decor accurately.
By addressing common paint failures, selecting cohesive palettes, and hanging art at eye level, you can instantly elevate your space.
Quick Answer:
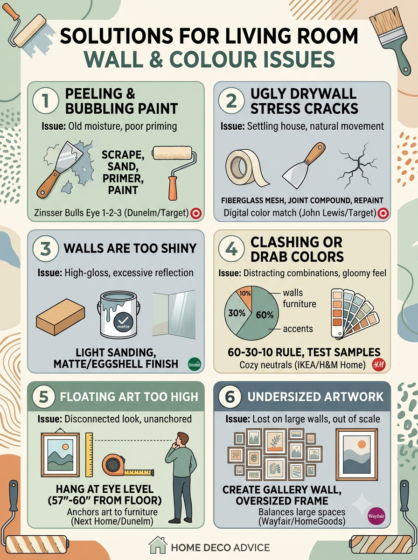
Fix bubbling or peeling paint by scraping, sanding, priming, and addressing underlying moisture issues.
Repair drywall stress cracks using fiberglass mesh tape and joint compound before repainting.
Tone down an overly glossy wall by lightly sanding the surface and applying a matte or eggshell finish.
Balance your color palette using the 60-30-10 rule and hang artwork exactly 57 to 60 inches from the floor.
Why Is My Living Room Paint Peeling, Chipping, or Bubbling?
It can be incredibly frustrating to sit down after a long day only to notice your beautiful accent wall starting to flake away. This annoying problem usually stems from hidden moisture, poor surface preparation, or trying to apply latex paint directly over an old oil-based layer.
Here is the thing: painting over a problem area without fixing the root cause is just putting a temporary bandage on a wound. To properly tackle this issue, you need to scrape away every single loose flake using a flexible putty knife. Once the area is clear, sand the edges smooth so they blend seamlessly with the rest of the wall. Next, apply a high-quality, stain-blocking primer like Zinsser Bulls Eye 1-2-3, which you can easily pick up from Dunelm or HomeGoods for around $15 / £12.
Moisture is the ultimate enemy of a smooth paint job. If you live in a damp climate or an older European terrace house, consider running a dehumidifier before you begin painting. After priming, apply two coats of your chosen topcoat, ensuring the room is well-ventilated so each layer dries completely.
PRO TIP: Never skip the primer stage when repairing a wall, especially in high-traffic spaces where temperature and humidity fluctuate throughout the seasons.
How Do I Repair Ugly Stress Cracks in My Drywall?
Houses naturally move, settle, and breathe over time, which frequently leads to hairline fractures appearing above doorways and windows. While these thin cracks are usually harmless structurally, they instantly make a beautifully curated space look tired and neglected.
Now here is where it gets interesting: simply wiping some filler over the crack with your finger will guarantee its return within a few months. To banish it for good, you want to widen the crack slightly with the edge of a scraper to create a clean channel for your repair material. Place a strip of self-adhesive fiberglass mesh tape directly over the fracture to give the area structural integrity. Spread a thin layer of lightweight joint compound over the tape, feathering the edges outward so it fades into the surrounding drywall.
Once it dries completely, sand it smooth with fine-grit sandpaper until you cannot feel the transition with your fingertips. Wipe away the dust with a damp microfiber cloth, prime the patch, and paint over it using your original wall color. If you no longer have the original tin, grab a small flake of the dried paint and take it to Target or John Lewis for an exact digital color match.
What Can I Do If My Wall Paint Is Way Too Glossy?
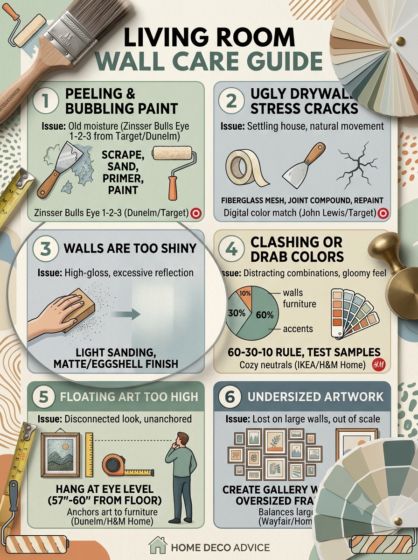
Choosing a paint finish looks easy on a small swatch, but coating an entire room in a high-sheen paint can turn your walls into a giant mirror. High-gloss finishes reflect every single ray of light, which cruelly highlights every lump, bump, and imperfection in your plaster.
And this is the part most people overlook: you cannot simply paint a matte finish directly over a glossy surface because the new layer will not adhere properly. To tone down that intense glare, you need to break the gloss barrier by giving the walls a thorough, gentle sanding. Use a medium-to-fine sandpaper block to scuff up the surface until the shiny reflection turns into a dull, chalky matte texture. Clean the walls with sugar soap or a mild detergent to remove every trace of dust and grease before moving forward.
Apply a dedicated bonding primer to ensure your new, softer finish sticks beautifully without peeling away later. When selecting your replacement paint, opt for an eggshell, satin, or flat matte finish from reputable brands found at Wayfair or Next Home. A beautiful matte finish absorbs light rather than bouncing it around, creating a velvety, sophisticated look that makes your living room feel instantly cozier.
How Can I Fix Drab or Distracting Living Room Color Combinations?
We have all been there—you pick a gorgeous paint sample under store lighting, but once it hits your walls, it looks completely wrong. Clashing colors or an overly drab palette can make your living room feel chaotic, cold, or just plain depressing.
The secret to mastering color harmonies lies in a classic interior design framework known as the 60-30-10 rule. Your dominant wall color should take up roughly 60% of the room, your secondary color (like furniture and curtains) covers 30%, and a vibrant accent color claims the remaining 10%. If your current walls feel blindingly bright, balance them out by introducing earthy, neutral tones through large area rugs or soft linen sofas from IKEA or H&M Home. For rooms that feel dark and dreary, you do not necessarily have to paint everything stark white; instead, try a warm, light-reflective beige or soft greige.
Imagine walking into your living room and feeling an instant wave of calm because the undertones of your walls match your wooden floorboards perfectly. Test your new shades by painting large sample patches on different walls and watching how they change from morning light to evening lamplight. Spending $10 / £8 on a few sample pots will save you hundreds of dollars and hours of regret down the line.
Why Does My Wall Art Look Like It Is Floating Too High?
One of the most common decorating mistakes is hanging gorgeous artwork way too close to the ceiling, creating an awkward, disconnected floating effect. When art is hung too high, it breaks the visual link between your seating arrangements and your walls, making the room feel disjointed.
To solve this issue permanently, you should follow the golden museum standard: always hang your artwork at eye level. This means the center of the framed picture should sit exactly 57 to 60 inches (roughly 145 to 152 cm) from the living room floor. If you are hanging a large canvas directly above a sofa or a console table from Dunelm, aim to leave a gap of about 6 to 8 inches between the bottom of the frame and the top of the furniture pieces. This spacing anchors the artwork to the furniture, transforming the two separate elements into one cohesive, beautiful focal point.
Before driving any nails into your freshly painted plaster, map out your arrangement using cheap brown craft paper cut to the size of your frames. Tape these paper templates to the wall using painter’s tape, step back to the entrance of the room, and check the height from various angles.
PRO TIP: If you are shorter or taller than average, stick strictly to the 58-inch rule to ensure your art feels comfortable for guests of all heights.
How Do I Fix the Look of Undersized Artwork on Large Walls?
A tiny frame stranded on a massive, expansive wall can make an entire living room feel empty, unfinished, and completely out of proportion. Large walls demand visual weight, and ignoring scale can leave even the most expensive designer furniture looking cheap and misplaced.
You do not need to spend a fortune on a massive, single piece of original art to fill up that empty vertical space. One brilliant, budget-friendly solution is to create a curated gallery wall using a collection of smaller, cohesive frames from stores like Target or IKEA. Arrange your frames in a tight grid pattern, keeping the distance between each frame to a consistent 2 to 3 inches so they read as a single large design element. Alternatively, you can purchase an oversized frame and use a wide, generous mat board to make a smaller print look grand and intentional.
Another wonderful approach for large walls is incorporating textured elements like open wooden shelving or hanging textiles alongside your framed pieces. This adds depth and breaks up the monotony of a flat drywall surface without overwhelming the room with too many colors. By filling roughly two-thirds to three-quarters of the available wall space, your room will instantly feel balanced, cozy, and professionally styled.
Frequently Asked Questions About Living Room Walls and Wall Colours Issues and Their Solution
Q: How do I know if my wall paint is oil-based or water-based? A: Soak a cotton ball in rubbing alcohol and rub it firmly over a small, inconspicuous patch of your wall. If the paint rubs off onto the cotton, it is water-based latex; if it remains completely unaffected, you are dealing with an older oil-based paint.
Q: What is the best living room wall color to make a small space look larger? A: Soft, light-reflective neutrals like crisp alabaster, pale greige, or soft seafoam green work beautifully to open up tight spaces. These shades bounce both natural light and artificial lamplight around the room, creating an illusion of expansive, airy depth.
Q: How long should I wait for joint compound to dry before painting over a wall crack? A: You should generally wait at least 24 hours for the compound to dry completely before sanding and priming the surface. If you live in a humid environment or applied a thick layer, give it a full 48 hours to prevent the paint from bubbling later.
Q: Can I fix a peeling wall by just painting over the loose flakes? A: No, painting directly over peeling paint will cause the new layer to crack and fail almost immediately. You must thoroughly scrape away all loose material, sand the surface flat, and apply a quality primer before adding a new coat of paint.
Q: How far apart should frames be placed when creating a living room gallery wall? A: Aim to keep a consistent gap of 2 to 3 inches (about 5 to 7 cm) between each frame in your layout. This tight spacing ensures the collection looks like a single, intentional installation rather than a messy scatter of random frames.
Addressing living room walls and wall colours issues and their solution is all about taking your time with proper preparation and understanding visual scale. When you fix those nagging cracks, choose the right paint finishes, and hang your art intentionally, your entire home transforms. Grab a couple of paint samples this weekend and start bringing your dream living room to life!
